Step 1: Prerequisites
- Before you proceed with integrating Truecaller SDK, make sure to complete the integration steps from the OTPless Android Headless SDK Documentation.
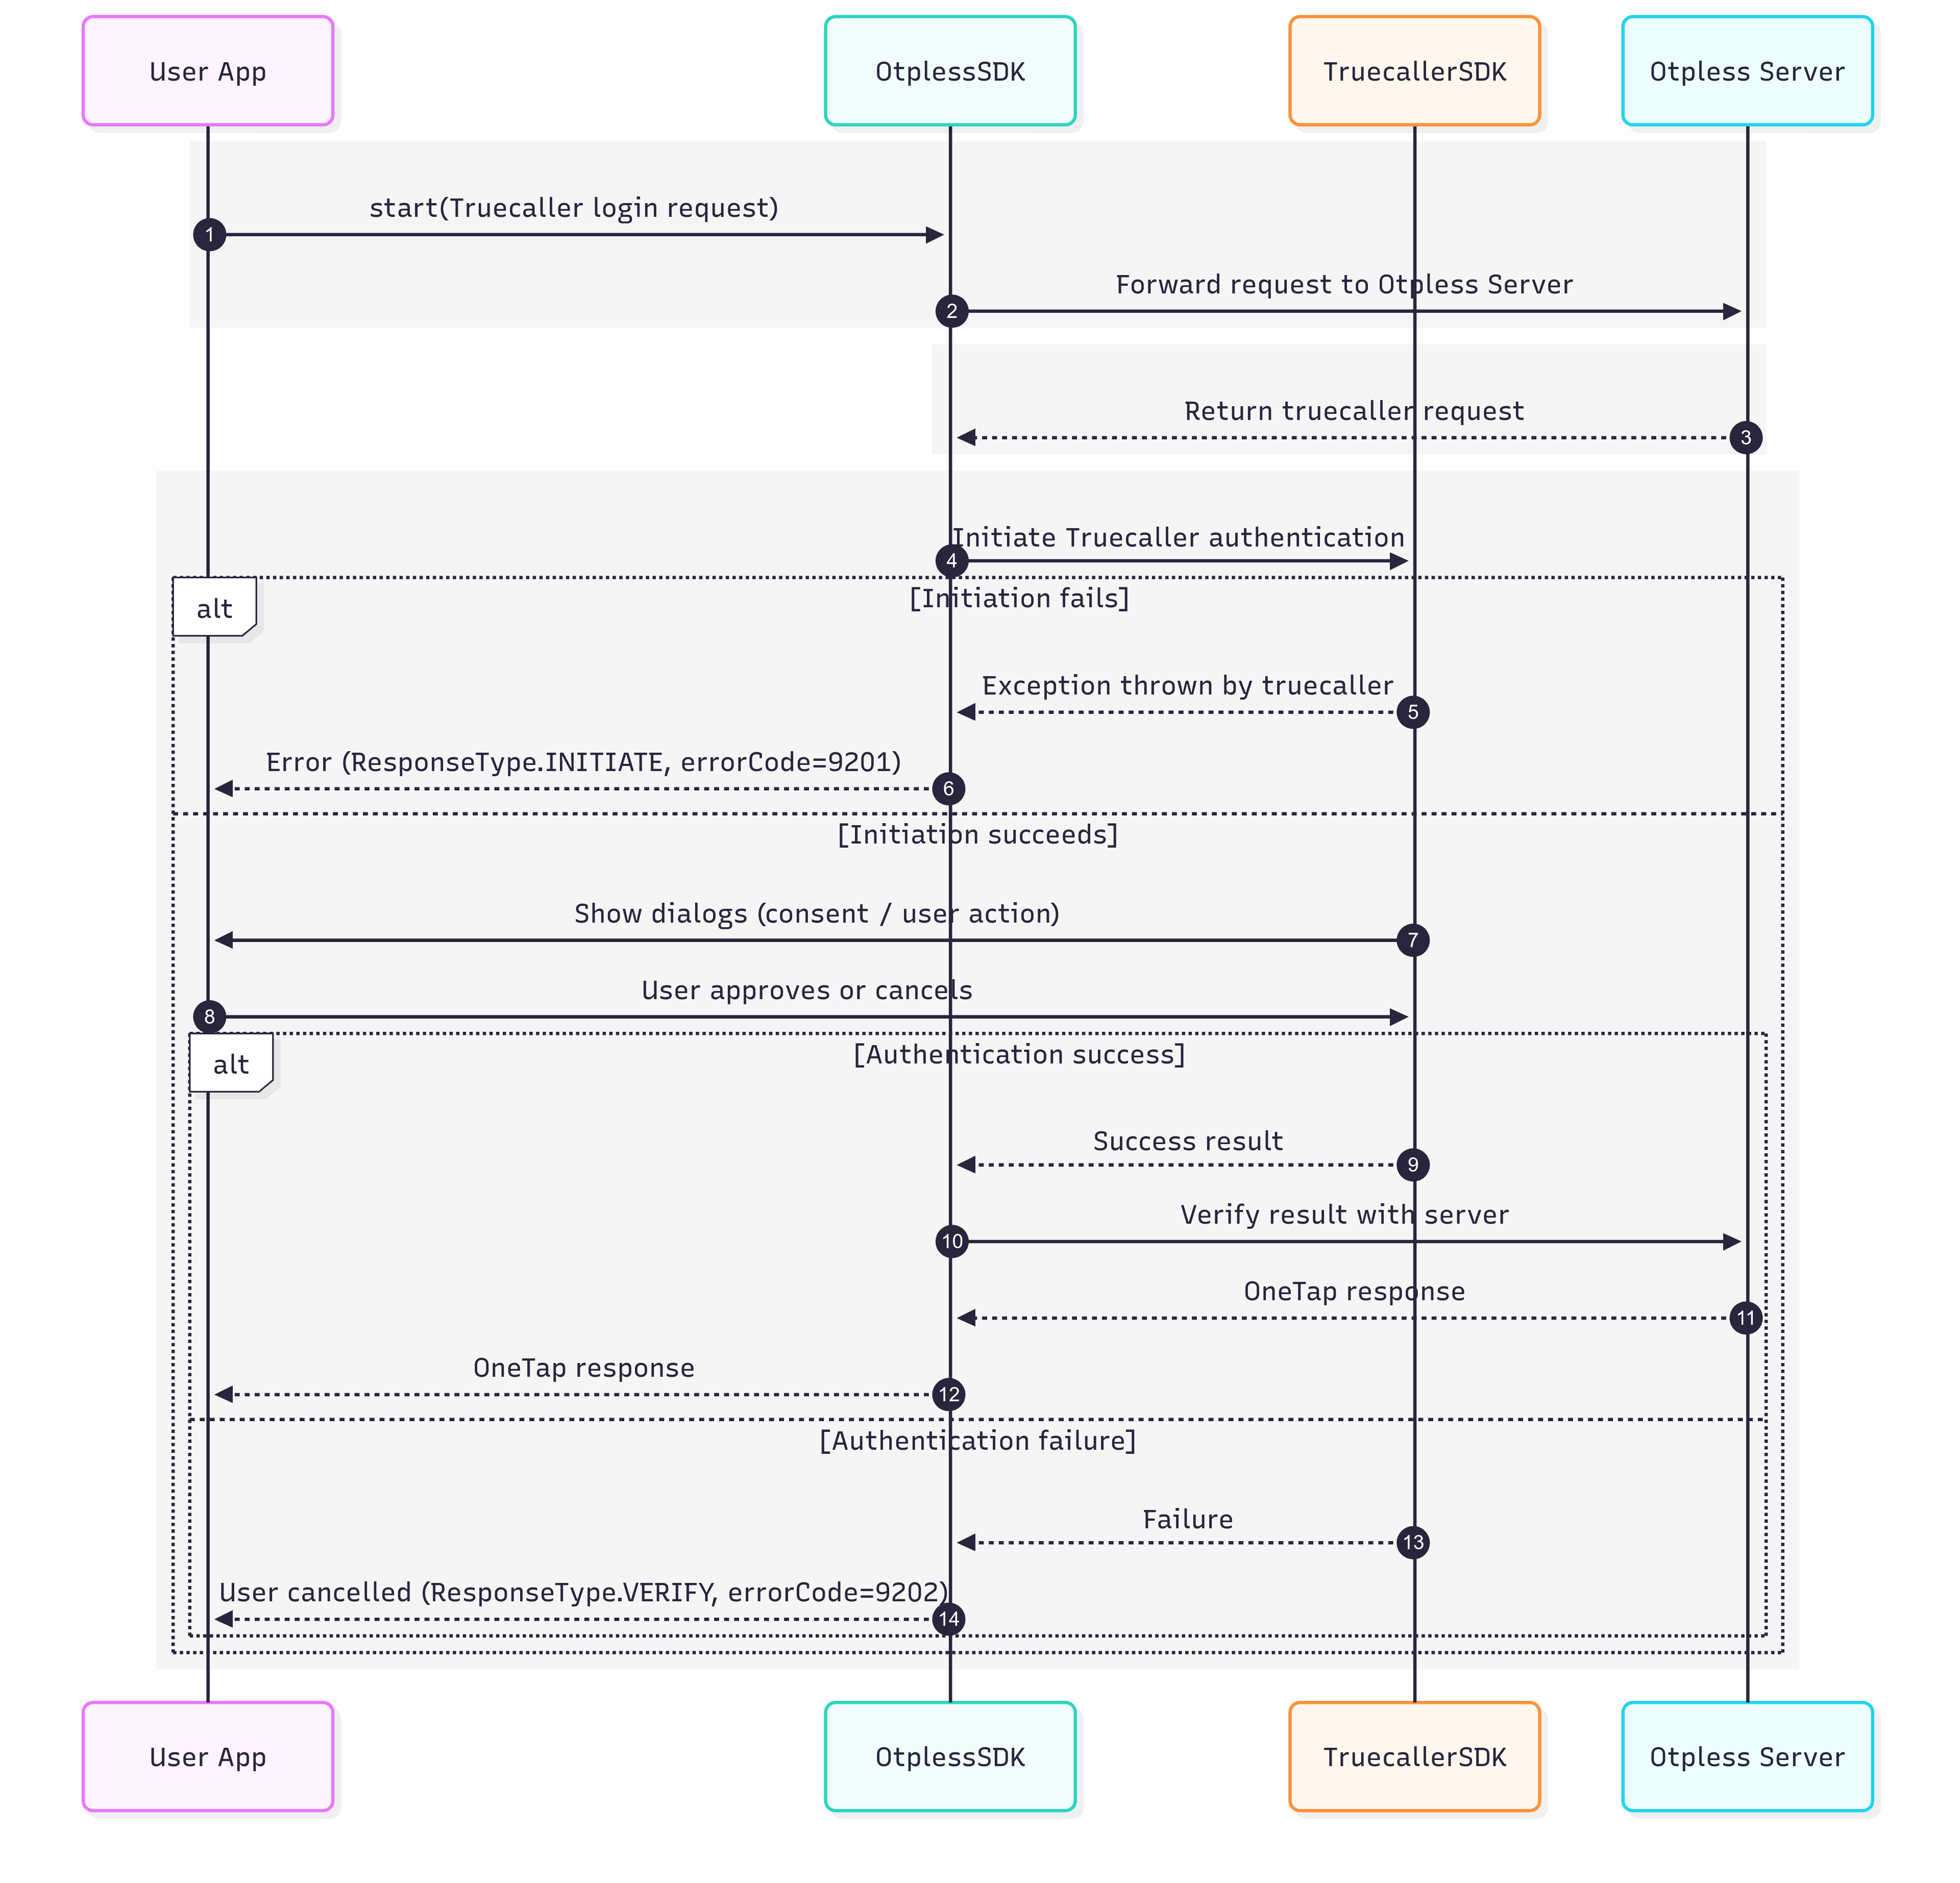
- Make sure you have ask OTPless support to enable Truecaller SSO
Step 2: Add Dependency
Add the required SDK dependenciesBuild.gradle
Use the latest version of - Otpless Truecaller SDK
Step 3: Create Truecaller App and Update Client Id
- Register your app on the Truecaller Developer Console.
- Copy the below line of code in your string.xml.
- Replace TRUECALLER_CLIENT_ID with the client id provided by truecaller on dashboard.
During development, make sure to also register your test phone numbers and SHA-256 fingerprints in the same section to avoid authentication failures.
Step 4: Create Truecaller request
- All Parameters are optional and has a equivalent map with the parameters of Truecaller SDK
Kotlin
Parameters
- footerType → Type of footer (e.g., disclaimer or consent note).
- shape → Button shape (rectangle, rounded, circular).
- verifyOption → Verification method (auto/manual/server-side).
- heading → Heading or consent text above the button.
- loginPrefixText → Prefix text before the login button (e.g., Login with).
- ctaText → Call-to-action text inside the button.
- locale → Language/region setting for UI texts.
- buttonColor → Background color of the login button.
- buttonTextColor → Text color of the login button.
Step 5: Initialize the Truecaller SDK
- Initialize the Truecaller SDK inside your
ActivityorFragment. This step ensures that the SDK is properly set up to handle authentication flows via Truecaller. - You should call
initTrueCallerafter callingOtplessSDK.initin activity oronViewCreatedmethod of fragment. initTrueCallerreturnsbooleanwhich tells if truecaller authentication is supported or not.- If truecaller authentication is not supported then you should continue with smart authentication.
Kotlin
Step 6: Handle onActivityResult
Depending on your integration type, override the onActivityResult method in the correct component:
- Fragment → if you used
OTScopeRequest.FragmentRequest - Activity → if you used
OTScopeRequest.ActivityRequest
Kotlin
Step 7: Start the Truecaller SSO Flow
- To start the sign-in process with Truecaller, create an Otpless request and set the channel type to
TRUECALLER. - Invoke the SDK using
OtplessSDK.start.
Kotlin
Truecaller Native Authentication Flow