Requirements
- The compileSdk version should be 35.
- The minimum SDK version supported by the SDK is 21.
- The kotlin version should be 1.9.0 and above.
- The gradle version should be 8.3.1 and above.
Overview
OTPless SDK accepts the user’s identity (phone number or email), authenticates through multiple channels, and returns a secure token upon success.The merchant app sends this token to its backend, which verifies it with the OTPless Server before proceeding with the user journey.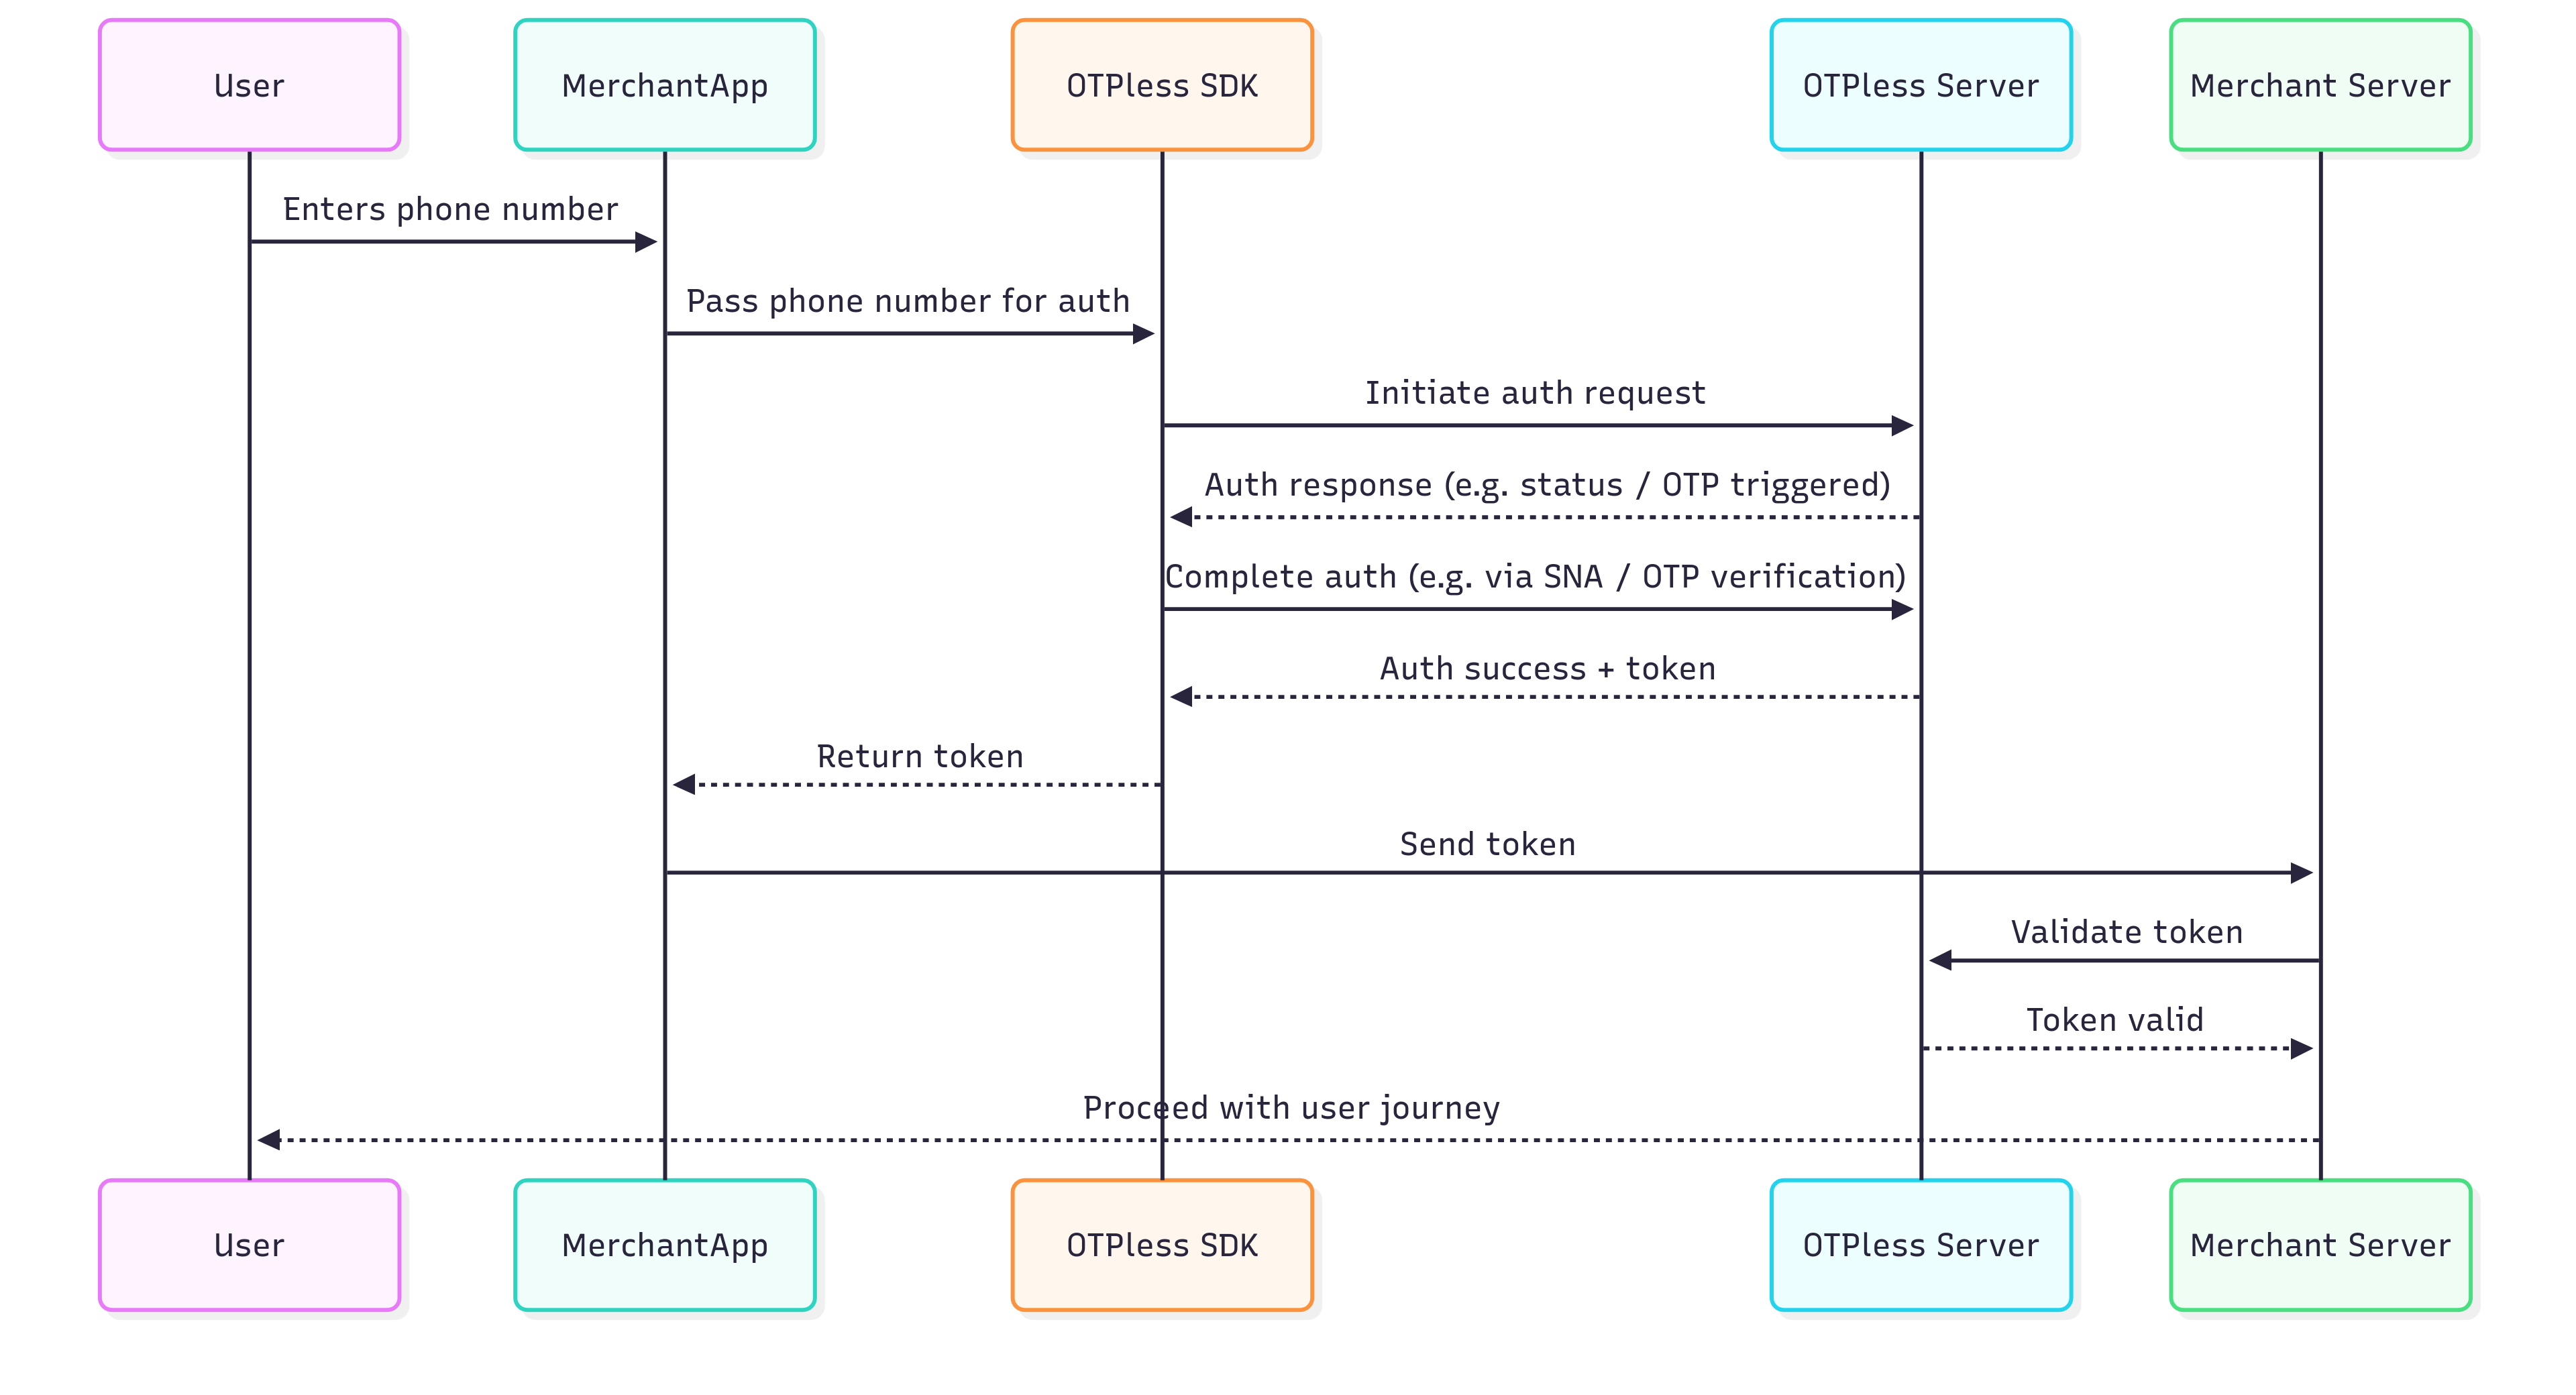
Integration Steps
Step 1: Add SDK Dependency
First, let’s add the OTPLESS SDK to your project. Update your app’sbuild.gradle file by adding the following dependency:
Please check the latest version of the SDK here.
Make sure to synchronize your Gradle project to fetch the dependency.
Step 2: Update AndroidManifest.xml
Add this intent filter to your LoginActivity inAndroidManifest.xml:
Replace
YOUR_APP_ID with your actual App
ID provided in
your OTPLESS dashboard.
🔍 Example: If your App ID is “AcmeApp123”, scheme becomes otpless.acmeapp123
Additionally, ensure your activity is set to singleTop launch mode and that the exported attribute is true:
Silent Network Authentication (SNA) Setup
- Make sure that Silent Network Authentication is enabled on the OTPLESS dashboard.
- Once you have successfully integrated OTPLESS Android SDK in your application, you only have to add the following line in your app’s
AndroidManifestfile in the<application>tag:
Learn more about Silent Network Authentication.
Step 3: Add SDK Initialization
ImportOtplessSDK in your LoginActivity.ktfile:
LoginActivity or LoginFragment depending upon your application architecture.
In case of:
- LoginActivity - Initialise the SDK in the
onCreate()function - LoginFragment - Initialise the SDK in the
onViewCreated()function.
Replace
YOUR_APP_ID with your actual App
ID provided in
your OTPLESS dashboard.Step 4: Handle Callback
Now, let’s implement a callback method to handle the response from the OTPLESS SDK (SDK callback flow).Handle Initiate Error Response:
Handle Verify Response
onNewIntent()
Error Codes
Checkout error codes hereResponse Objects Structure
- SDK_READY
- FAILED
- INITIATE
- OTP_AUTO_READ
- VERIFY
- ONETAP
- DELIVERY_STATUS
- FALLBACK_TRIGGERED
Step 5: Initiate Authentication
Well done! You have completed the foundational setup of the SDK. Now, let’s move to the next step and understand how to initiate and verify different authentication modes. Choose the authentication mode you want to integrate from the options below:- Phone Auth
- Email Auth
- OAUTH
Phone Authentication 📱
Phone authentication allows users to verify their identity using their phone number. Merchants can choose from various authentication methods:
Phone authentication allows users to verify their identity using their phone number. Merchants can choose from various authentication methods:
- Silent Authentication (SNA) – Automatically verifies the user without requiring OTP or MAGICLINK.
- OTP on Desired Channel – Sends a one-time password (OTP) via SMS, WhatsApp, or another preferred channel.
- Magic Link – Sends a link that users can click to authenticate.
- SNA + OTP – Uses silent authentication first and falls back to OTP if needed.
- OTP + Magic Link – Sends both an OTP and a magic link, allowing users to authenticate via either method.
Verify OTP
To verify the OTP entered by the user, use theverify method with the necessary parameters. Verifying OTP is required only in case of OTP authentication. No need to verify OTP in case of MAGICLINK.Validate ID Token
Learn how to securely `validate ID token` returned by OTPLESS android SDK to ensure the authenticity of sign-in events from your backend server.
Validate Token (Opaque)
Learn how to securely `validate token` returned by OTPLESS android SDK to ensure the authenticity of sign-in events from your backend server.