Overview
OTPless SDK accepts the user’s identity (phone number or email), authenticates through multiple channels, and returns a secure token upon success.The merchant app sends this token to its backend, which verifies it with the OTPless Server before proceeding with the user journey.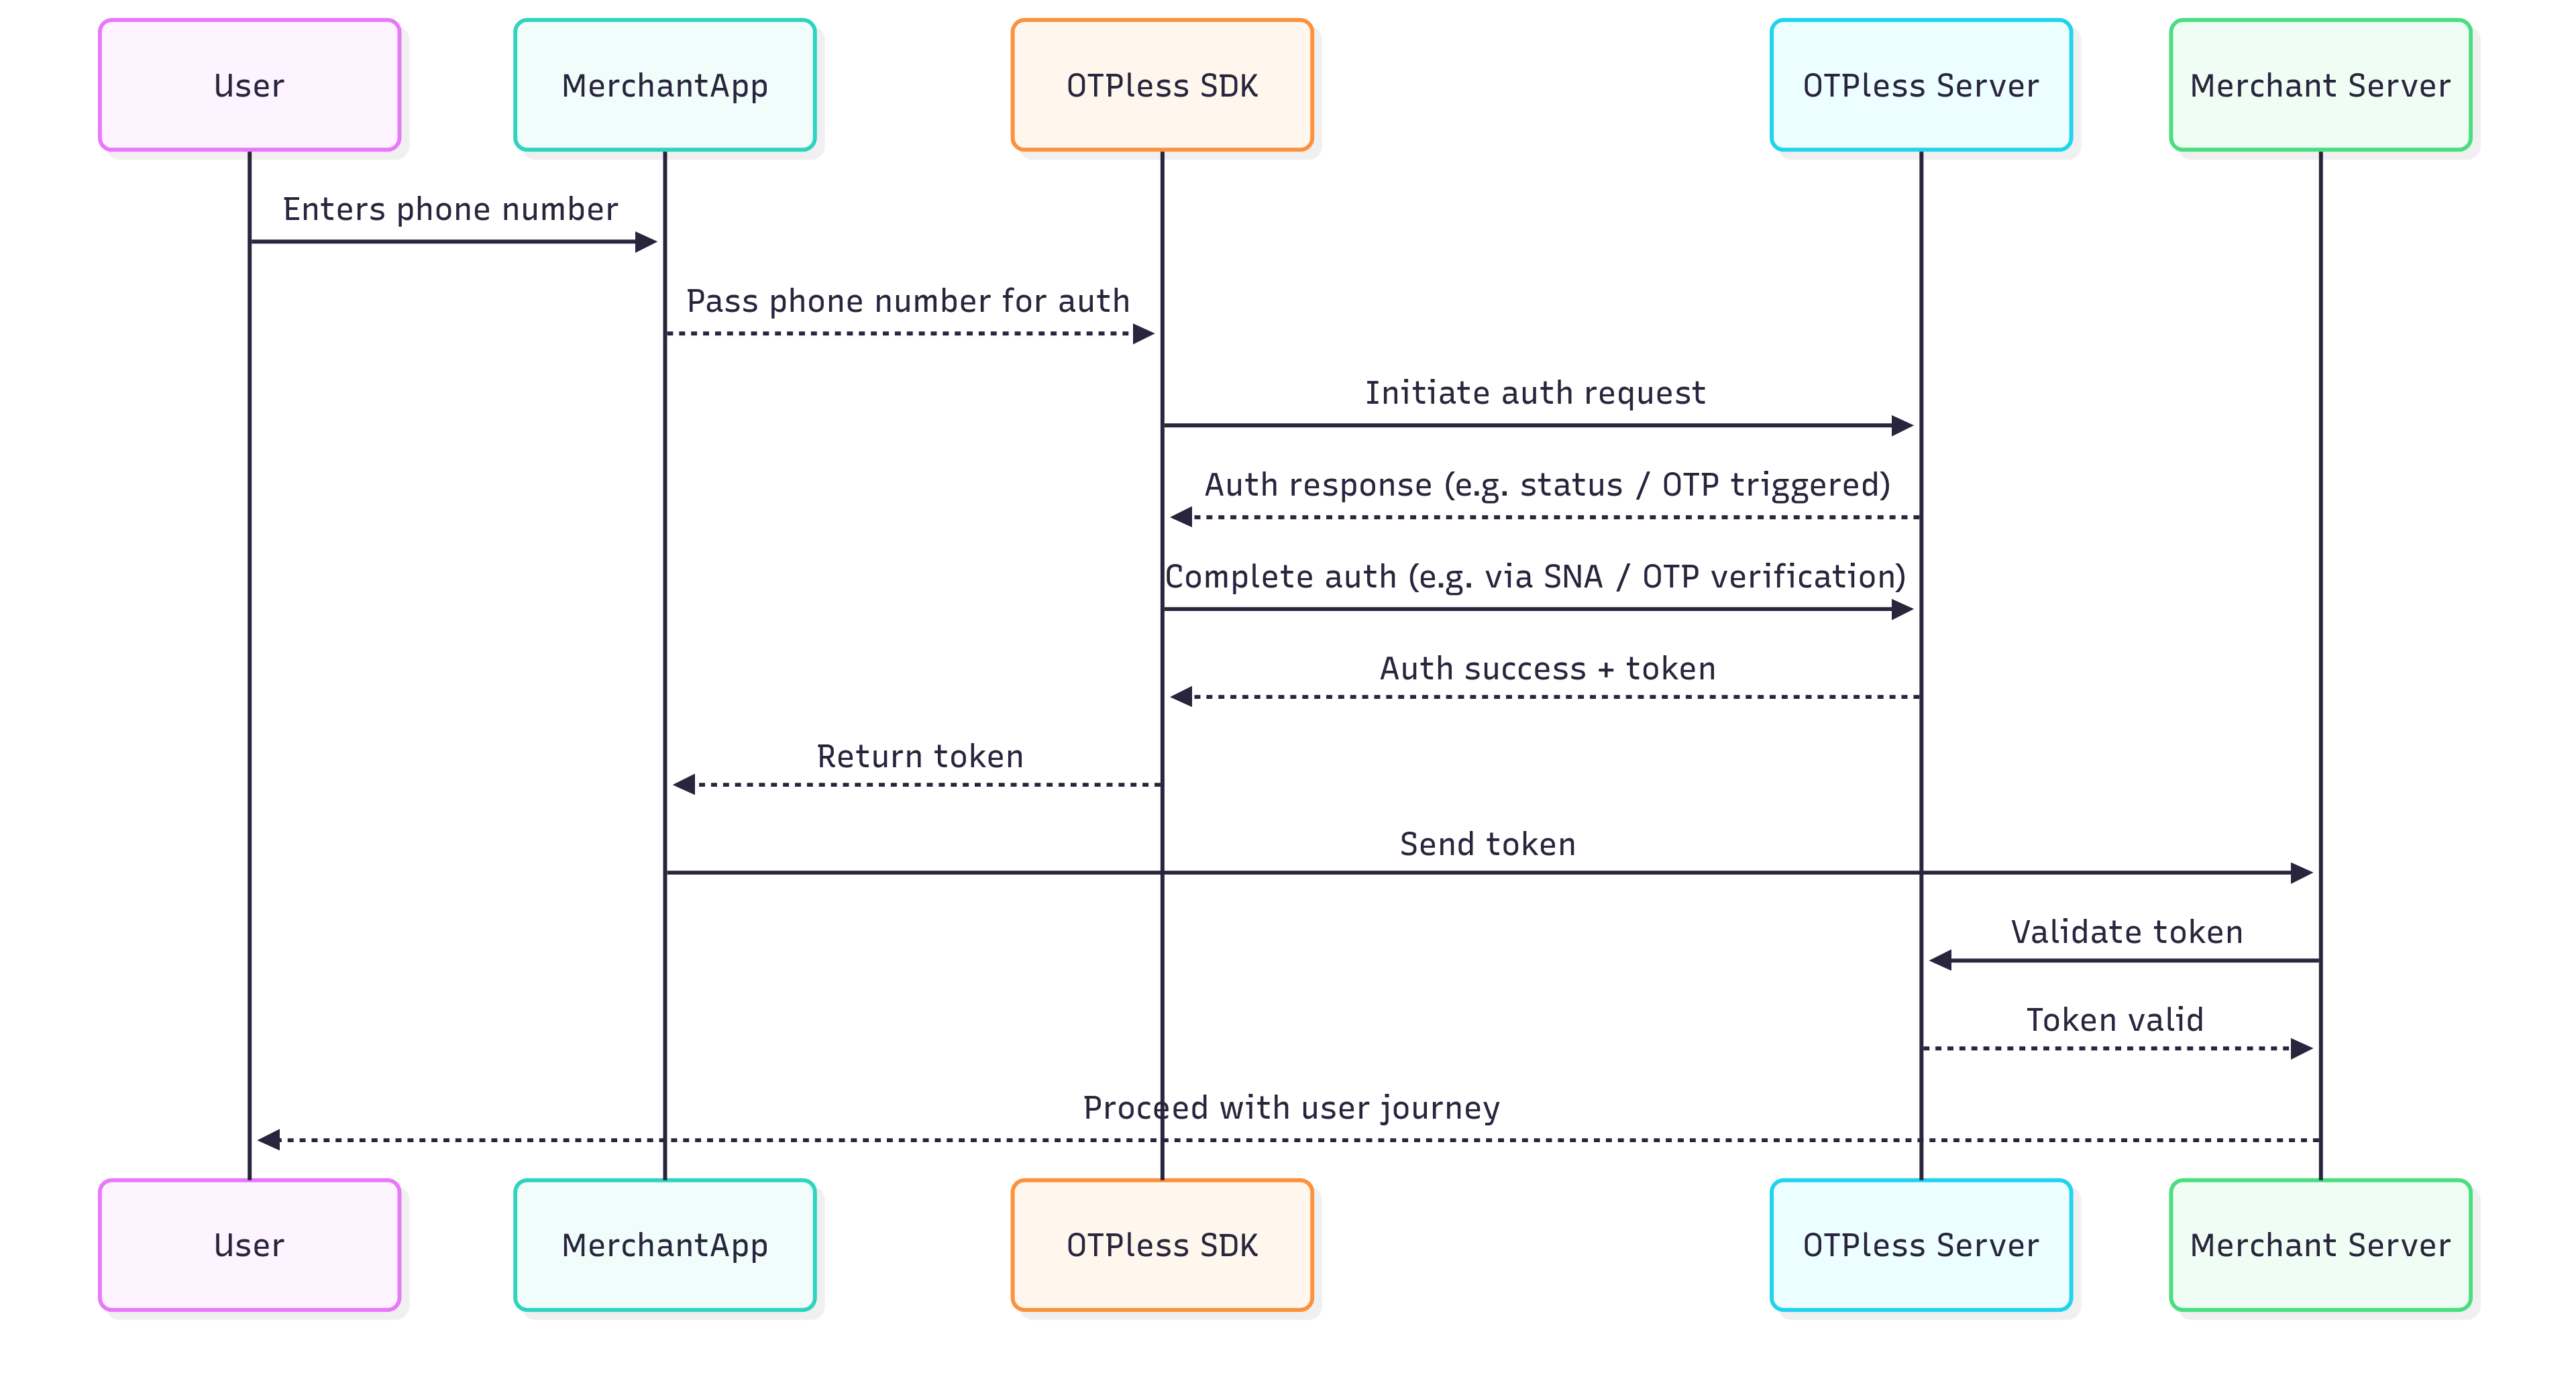
Integration Steps
Step 1: SDK Installation
SDK can be installed via both Cocoapods and Swift Package Manager.Please find the latest version of the SDK here.
Cocoapods
- Open your app’s project file
.xcodeproj. - Add the following line into the dependencies section of your project’s
Podfile:
Make sure to run the following commands in your root folder to fetch the
dependency.
Swift Package Manager
- In Xcode, click File > Swift Packages > Add Package Dependency.
- In the dialog that appears, enter the repository URL: https://github.com/otpless-tech/iOS-LP.
- Select the dependency rule as
exact versionand use the latest version.
Step 2: Setup SDK in your App
Add the following keys in yourinfo.plist file:
info.plist
ViewController.swift:
Step 3: Implement the ConnectResponseDelegate
YourViewController should conform to ConnectResponseDelegate:
LoginViewController.swift
Step 4: Initialize the SDK, Set Delegate and Start
Set the response delegate and optionally enable socket logging:LoginViewController.swift
LoginViewController.swift
Step 5: Stop the process
When your login page is closed or login is successful, stop the Otpless’ authentication process:LoginViewController.swift
Make sure that
initialize() is called again if you call cease().Configure Auth Method
Select from a wide array of auth methods, including SMS, WhatsApp, Email,
Google, and many more
Configure UI
Customize logos, headings, color schemes, and more to match your brand
identity and improve UX.
Validate ID Token
Learn how to securely `validate ID token` returned by OTPLESS ios SDK to ensure the authenticity of sign-in events from your backend server.
Validate Token (Opaque)
Learn how to securely `validate token` returned by OTPLESS ios SDK to ensure the authenticity of sign-in events from your backend server.