

Requirements
- iOS 13.0+
- Xcode 12.0+
- Swift 5.5+
Overview
OTPless SDK accepts the user’s identity (phone number or email), authenticates through multiple channels, and returns a secure token upon success.The merchant app sends this token to its backend, which verifies it with the OTPless Server before proceeding with the user journey.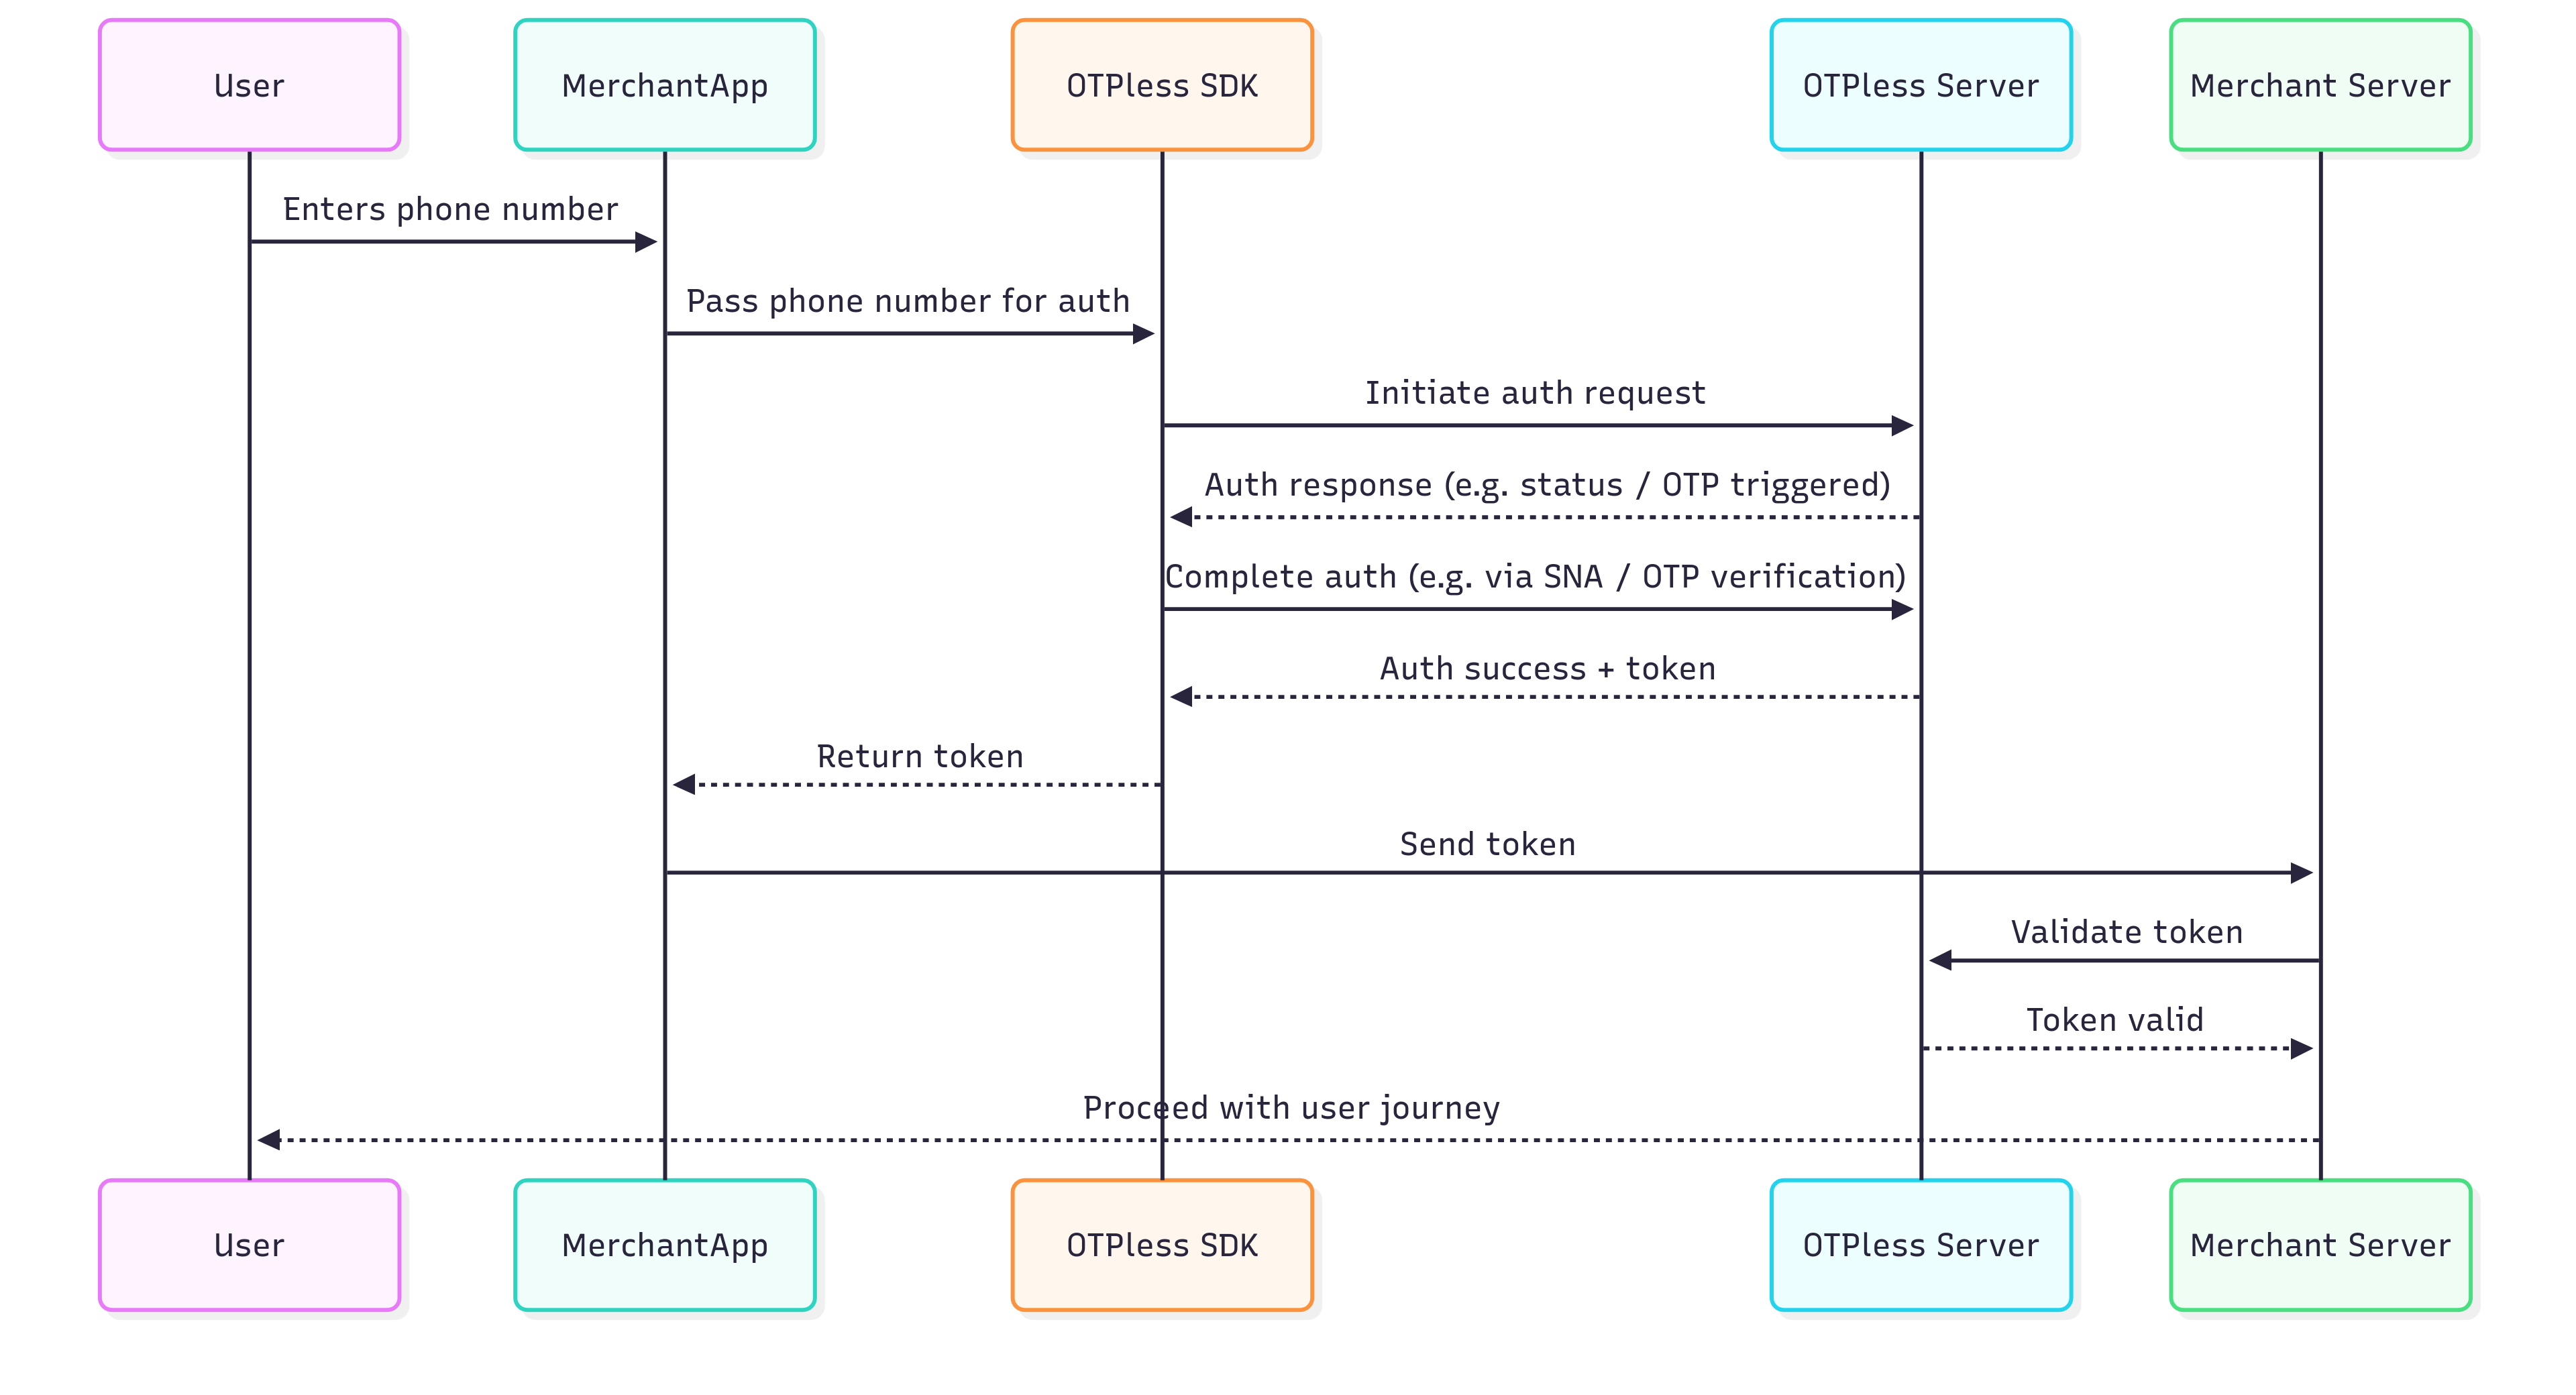
Integration Steps
Step 1: Add SDK Dependency
SDK can be installed via both Cocoapods and Swift Package Manager.Please find the latest version of the SDK here.
Cocoapods
- Open your app’s project file
.xcodeproj. - Add the following line into the dependencies section of your project’s
Podfile:
Make sure to run the following commands in your root folder to fetch the
dependency.
Swift Package Manager
- In Xcode, click File > Swift Packages > Add Package Dependency.
- In the dialog that appears, enter the repository URL: https://github.com/otpless-tech/otpless-headless-iOS-sdk.git.
- Select the dependency rule as
exact versionand use the latest version.
Step 2: Configure info.plist
Add the following block to yourInfo.plist file:
This step is only needed for Magic Link. Smart Auth integration do not require this step.
info.plist
Info.plist file only if you are using the SNA feature.
- If the
NSAppTransportSecuritykey is not already present, add the entire block below. - If the
NSAppTransportSecuritykey is already present, add the listed domains one by one underNSExceptionDomains.
info.plist
Step 3: Handle Redirection
Add the following code to yourApp Delegate to handle redirection:
This step is only needed for Magic Link. Smart Auth integration do not require this step.
Step 4: Initialize OTPLESS
Import OtplessBM in your signup/sign in file.ViewController.swift
Step 5: Handle Callback
Conform toOtplessResponseDelegate in your signup/sign in file to receive callbacks from OtplessBM (SDK callback flow).
Handle Initiate error response:
Handle Verify error response:
Step 6: Create a Task:
Create a task to initiate the authentication process based on the user’s selected method.
- Store the tasks created during Otpless authentication in the
otplessTaskvariable. - Cancel the ongoing task before creating a new task to prevent duplication of requests or sending same request twice.
Response Objects Structure
- SDK_READY
- FAILED
- INITIATE
- OTP_AUTO_READ
- VERIFY
- ONETAP
- DELIVERY_STATUS
- FALLBACK_TRIGGERED
Step 7: Initiate Authentication
Initiate the authentication process based on the user’s selected method by using theinitiate method of the SDK.
- Phone Auth
- Email Auth
- OAUTH
Phone Authentication 📱
Phone authentication allows users to verify their identity using their phone number. Merchants can choose from various authentication methods:
Phone authentication allows users to verify their identity using their phone number. Merchants can choose from various authentication methods:
- Silent Authentication (SNA) – Automatically verifies the user without requiring OTP or MAGICLINK.
- OTP on Desired Channel – Sends a one-time password (OTP) via SMS, WhatsApp, or another preferred channel.
- Magic Link – Sends a link that users can click to authenticate.
- SNA + OTP – Uses silent authentication first and falls back to OTP if needed.
- OTP + Magic Link – Sends both an OTP and a magic link, allowing users to authenticate via either method.
Verify OTP
To verify the OTP entered by the user, use theverify method with the necessary parameters. Verifying OTP is required only in case of OTP authentication. No need to verify OTP in case of MAGICLINK.🏁 Checkpoint
To ensure a smooth integration process:- Deploy your app/website with the included OTPLESS SDK.
- Conduct tests to verify the sign-in flow functions correctly.
- Ensure that after a successful sign-in, the user is redirected back to your app/website and their information is correctly logged in the console.