Overview
OTPless SDK accepts the user’s identity (phone number or email), authenticates through multiple channels, and returns a secure token upon success.The merchant app sends this token to its backend, which verifies it with the OTPless Server before proceeding with the user journey.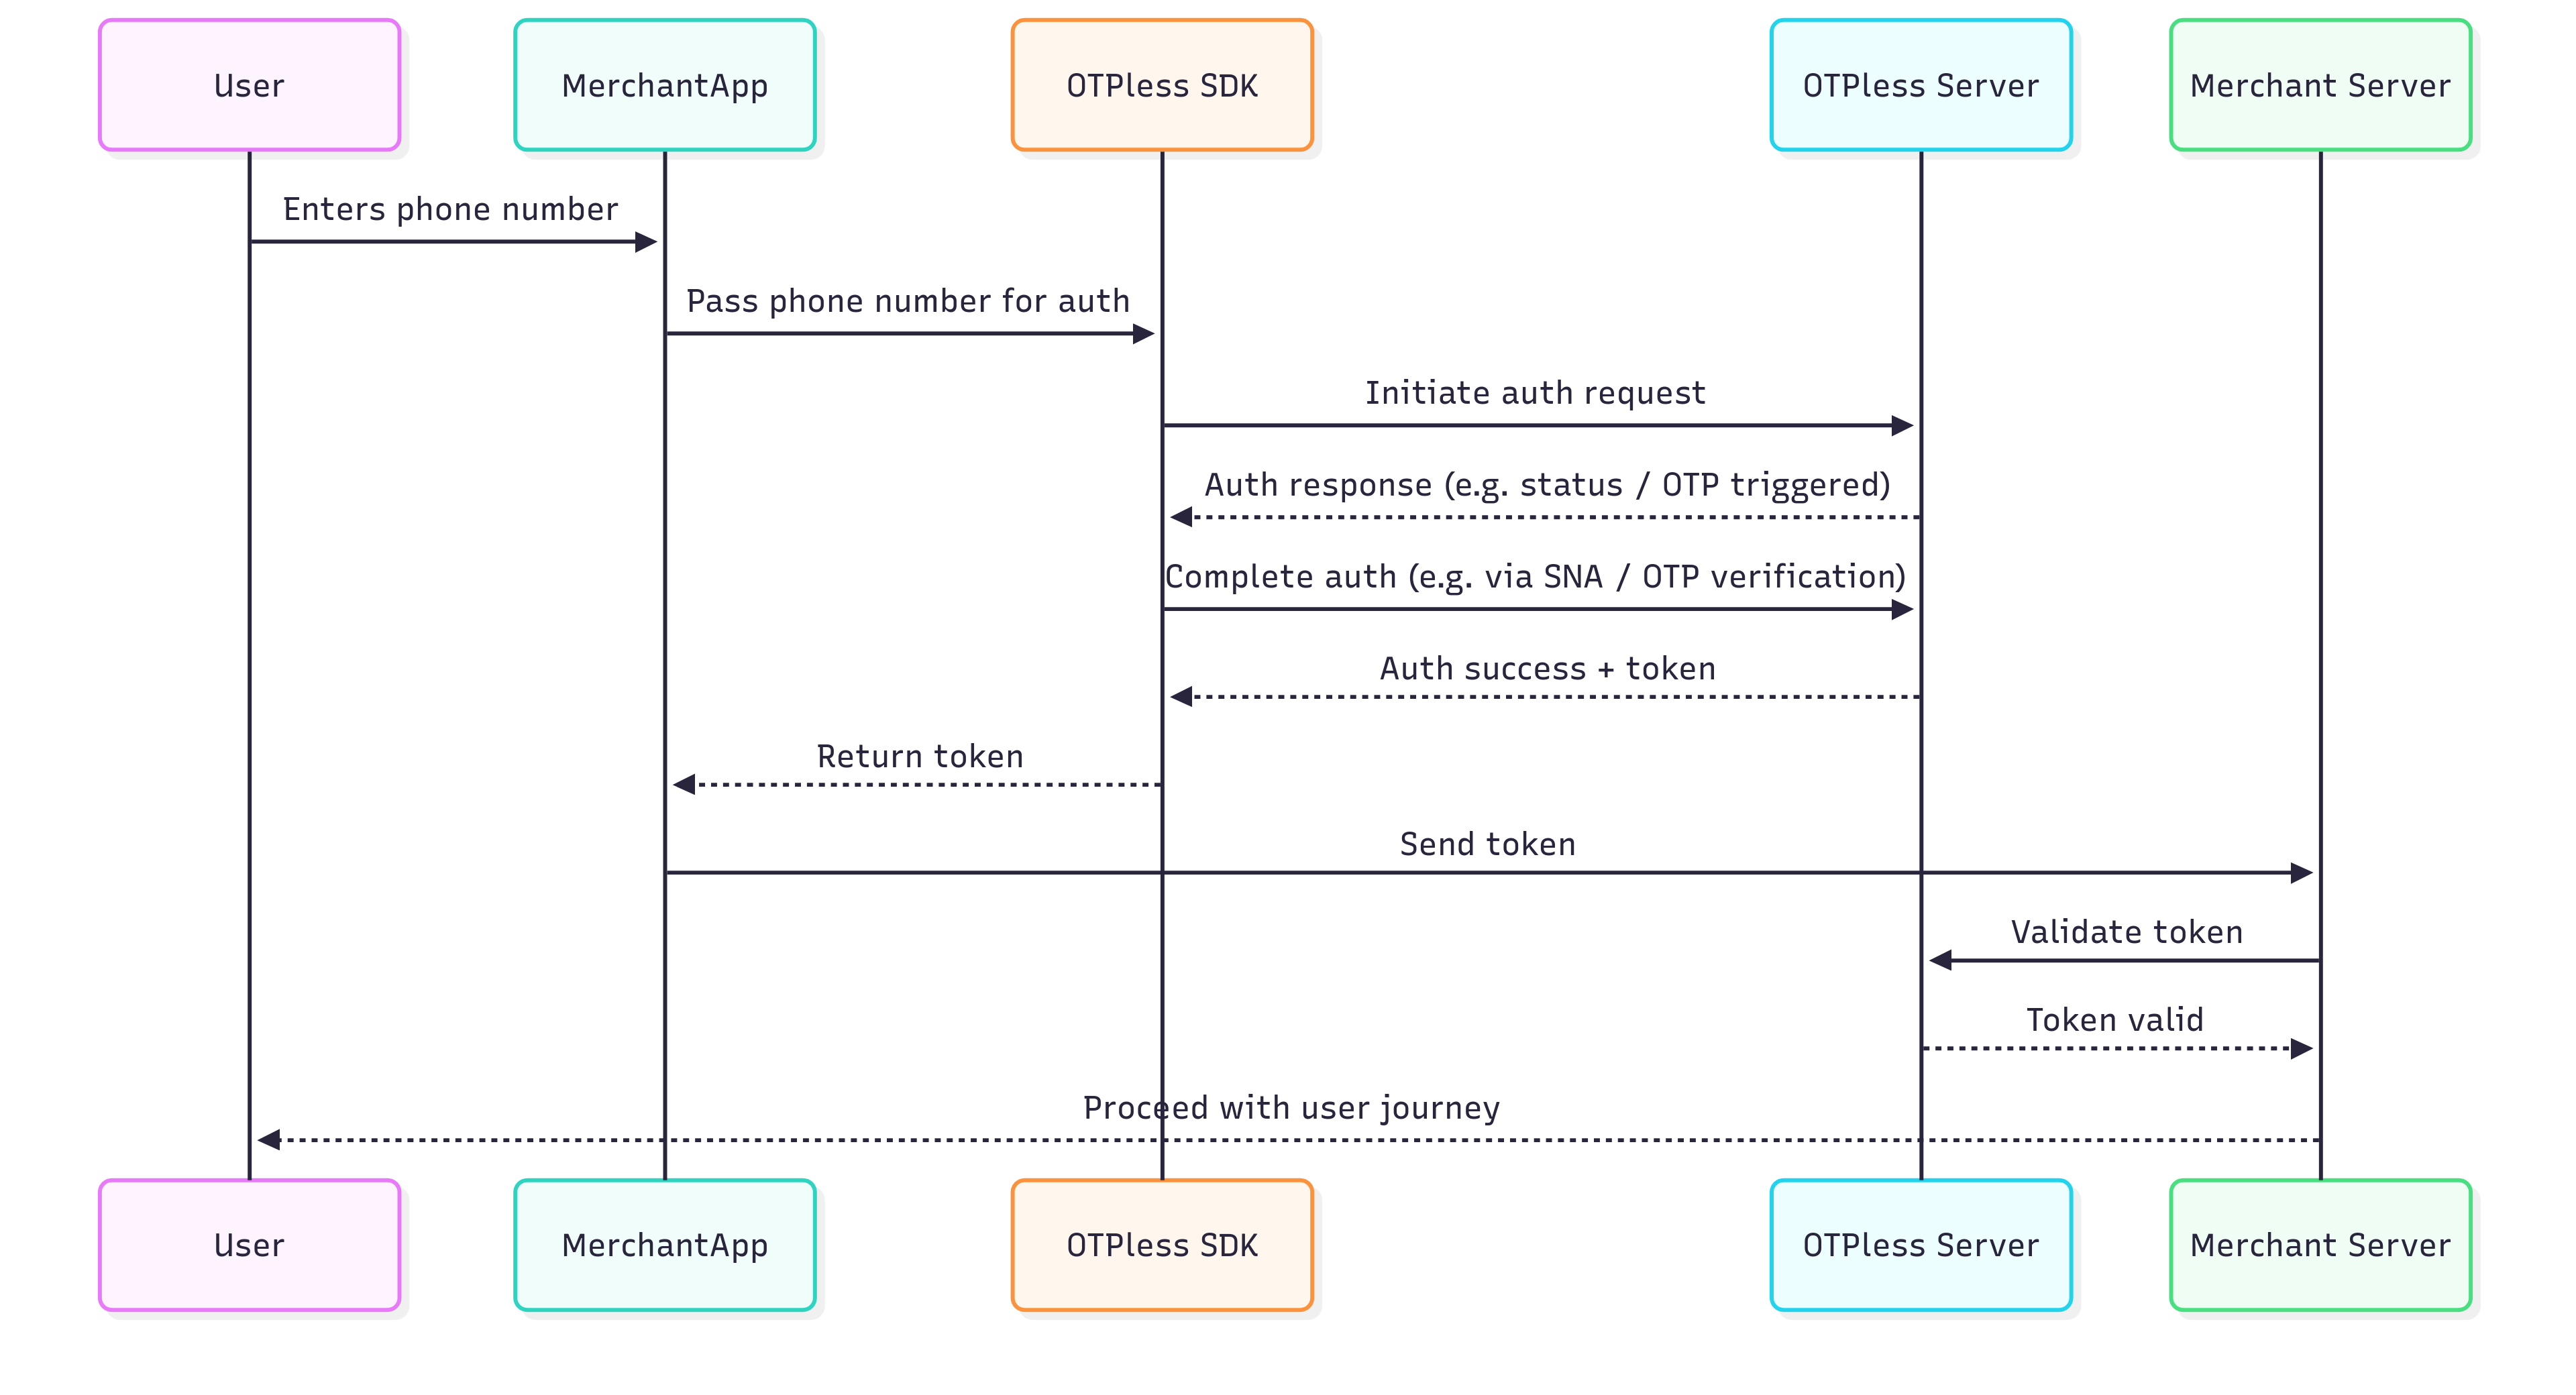
Integration Steps
Step 1: Install OTPLESS SDK Dependency
Install the OTPLESS SDK dependency by running the following command in your terminal at the root of your Ionic project:Step 2: Platform-specific Integrations
- Android
- iOS
- Add intent filter inside your
android/app/src/main/AndroidManifest.xmlfile into your Main activity code block:
- Add Network Security Config inside your
android/app/src/main/AndroidManifest.xmlfile into your<application>code block (Only required if you are using the SNA feature):
Replace
YOUR_APP_ID with your actual App
ID provided in
your OTPLESS dashboard.- Change your activity launchMode to singleTop and exported true for your Main Activity:
- Add the following override method in
android/app/src/main/java/MainActivity.javato handle callback:
- Import the following classes:
- Add this code to your
onCreate()method in your main activity:
- Add this code to your
onBackPressed()method in your main activity:
Step 3: Setup your login screen
In your login screen, add the following code to initialize OTPLESS SDK:Step 4: Initiate Authentication
Well done! You have completed the foundational setup of the SDK. Now, let’s move to the next step and understand how to initiate and verify different authentication modes. Choose the authentication mode you want to integrate from the options below:OTP
Send a One-Time Password (OTP) via SMS, WhatsApp, or Email for secure user verification.
Magic Link
Provide a seamless login experience by sending an authentication link through SMS, WhatsApp, or Email.
Social Auth
Authenticate users through popular social applications like WhatsApp, Google, Apple, and GitHub.